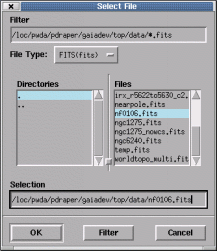
If you want to display an image, after starting GAIA, then pull down the menu marked "File" and select the "Open..." option. This creates a file browser in which you should locate your image file, or just type in the name in the Selection box. The various data formats that can be read should be shown here (NDF format and FITS are always available).
Various preset file filters are available for all the known data formats (one of the FITS filters is chosen in the example image). Note these are just filters, not image type selectors. The type of an image is always indicated by its file extension.
You can also specify one image to display when starting GAIA:
% gaia my_image &
And display images into a GAIA that is already running:
% gaiadisp my_image
(actually this command will also start GAIA if it fails to connect to an
existing instance). This command also (unlike the "gaia" command) accepts
options that control the data display range. These use the "-p" or "-l"
and "-h" options.
   % gaiadisp -p 98 my_image
   % gaiadisp -l 100 -h 200 my_image
To do this you need to create a completely new main window (but which is still part of this program) by selecting the "New Window" option of the "File" menu. A second image can then be displayed by selecting the "Open..." option of the "File" menu of the new window. You can have as many of these "cloned" windows as you want.
One use for cloned windows is as preparation for blink comparing images. Before blinking is allowed each image must be displayed in a clone.
To display a series of images from the command-line you can just do:
% gaiadisp image1 image2 image3 image4 ...
Or to display into a clone (numbered 2):
% gaiadisp my_image 2
Popup windows (like analysis and catalogue windows) tend to be associated with the clone that created them. When this is true the window title will have the "clone" number written into its title bar in parenthesis, e.g. a window with title "Image regions (1)" would be associated with the main window, "Image regions (2)" with the first clone created etc.).
You can resize the main window by dragging its edges, just like any other window. The penalty is that redraws will get slower and the program will require more memory.
If the shape of the main image display area is a problem (you'd like it to be more square), then the panel with the readouts and zoom/pan images can be temporarily removed, just open the "View" menu and select the "Hide control panel" option.
For the ultimate in control you can also remove any of the pan, zoom or color ramp windows permanently:
  % gaia -with_zoom_window 0
  % gaia -with_pan_window 0
  % gaia -with_colorramp 0
or get rid of them all with:
% gaia -with_zoom_window 0 -with_pan_window 0 -with_colorramp 0
Finally you can put the control panel in a window of its own:
% gaia -float_panel 1
This option is designed for very restricted size monitors.
See